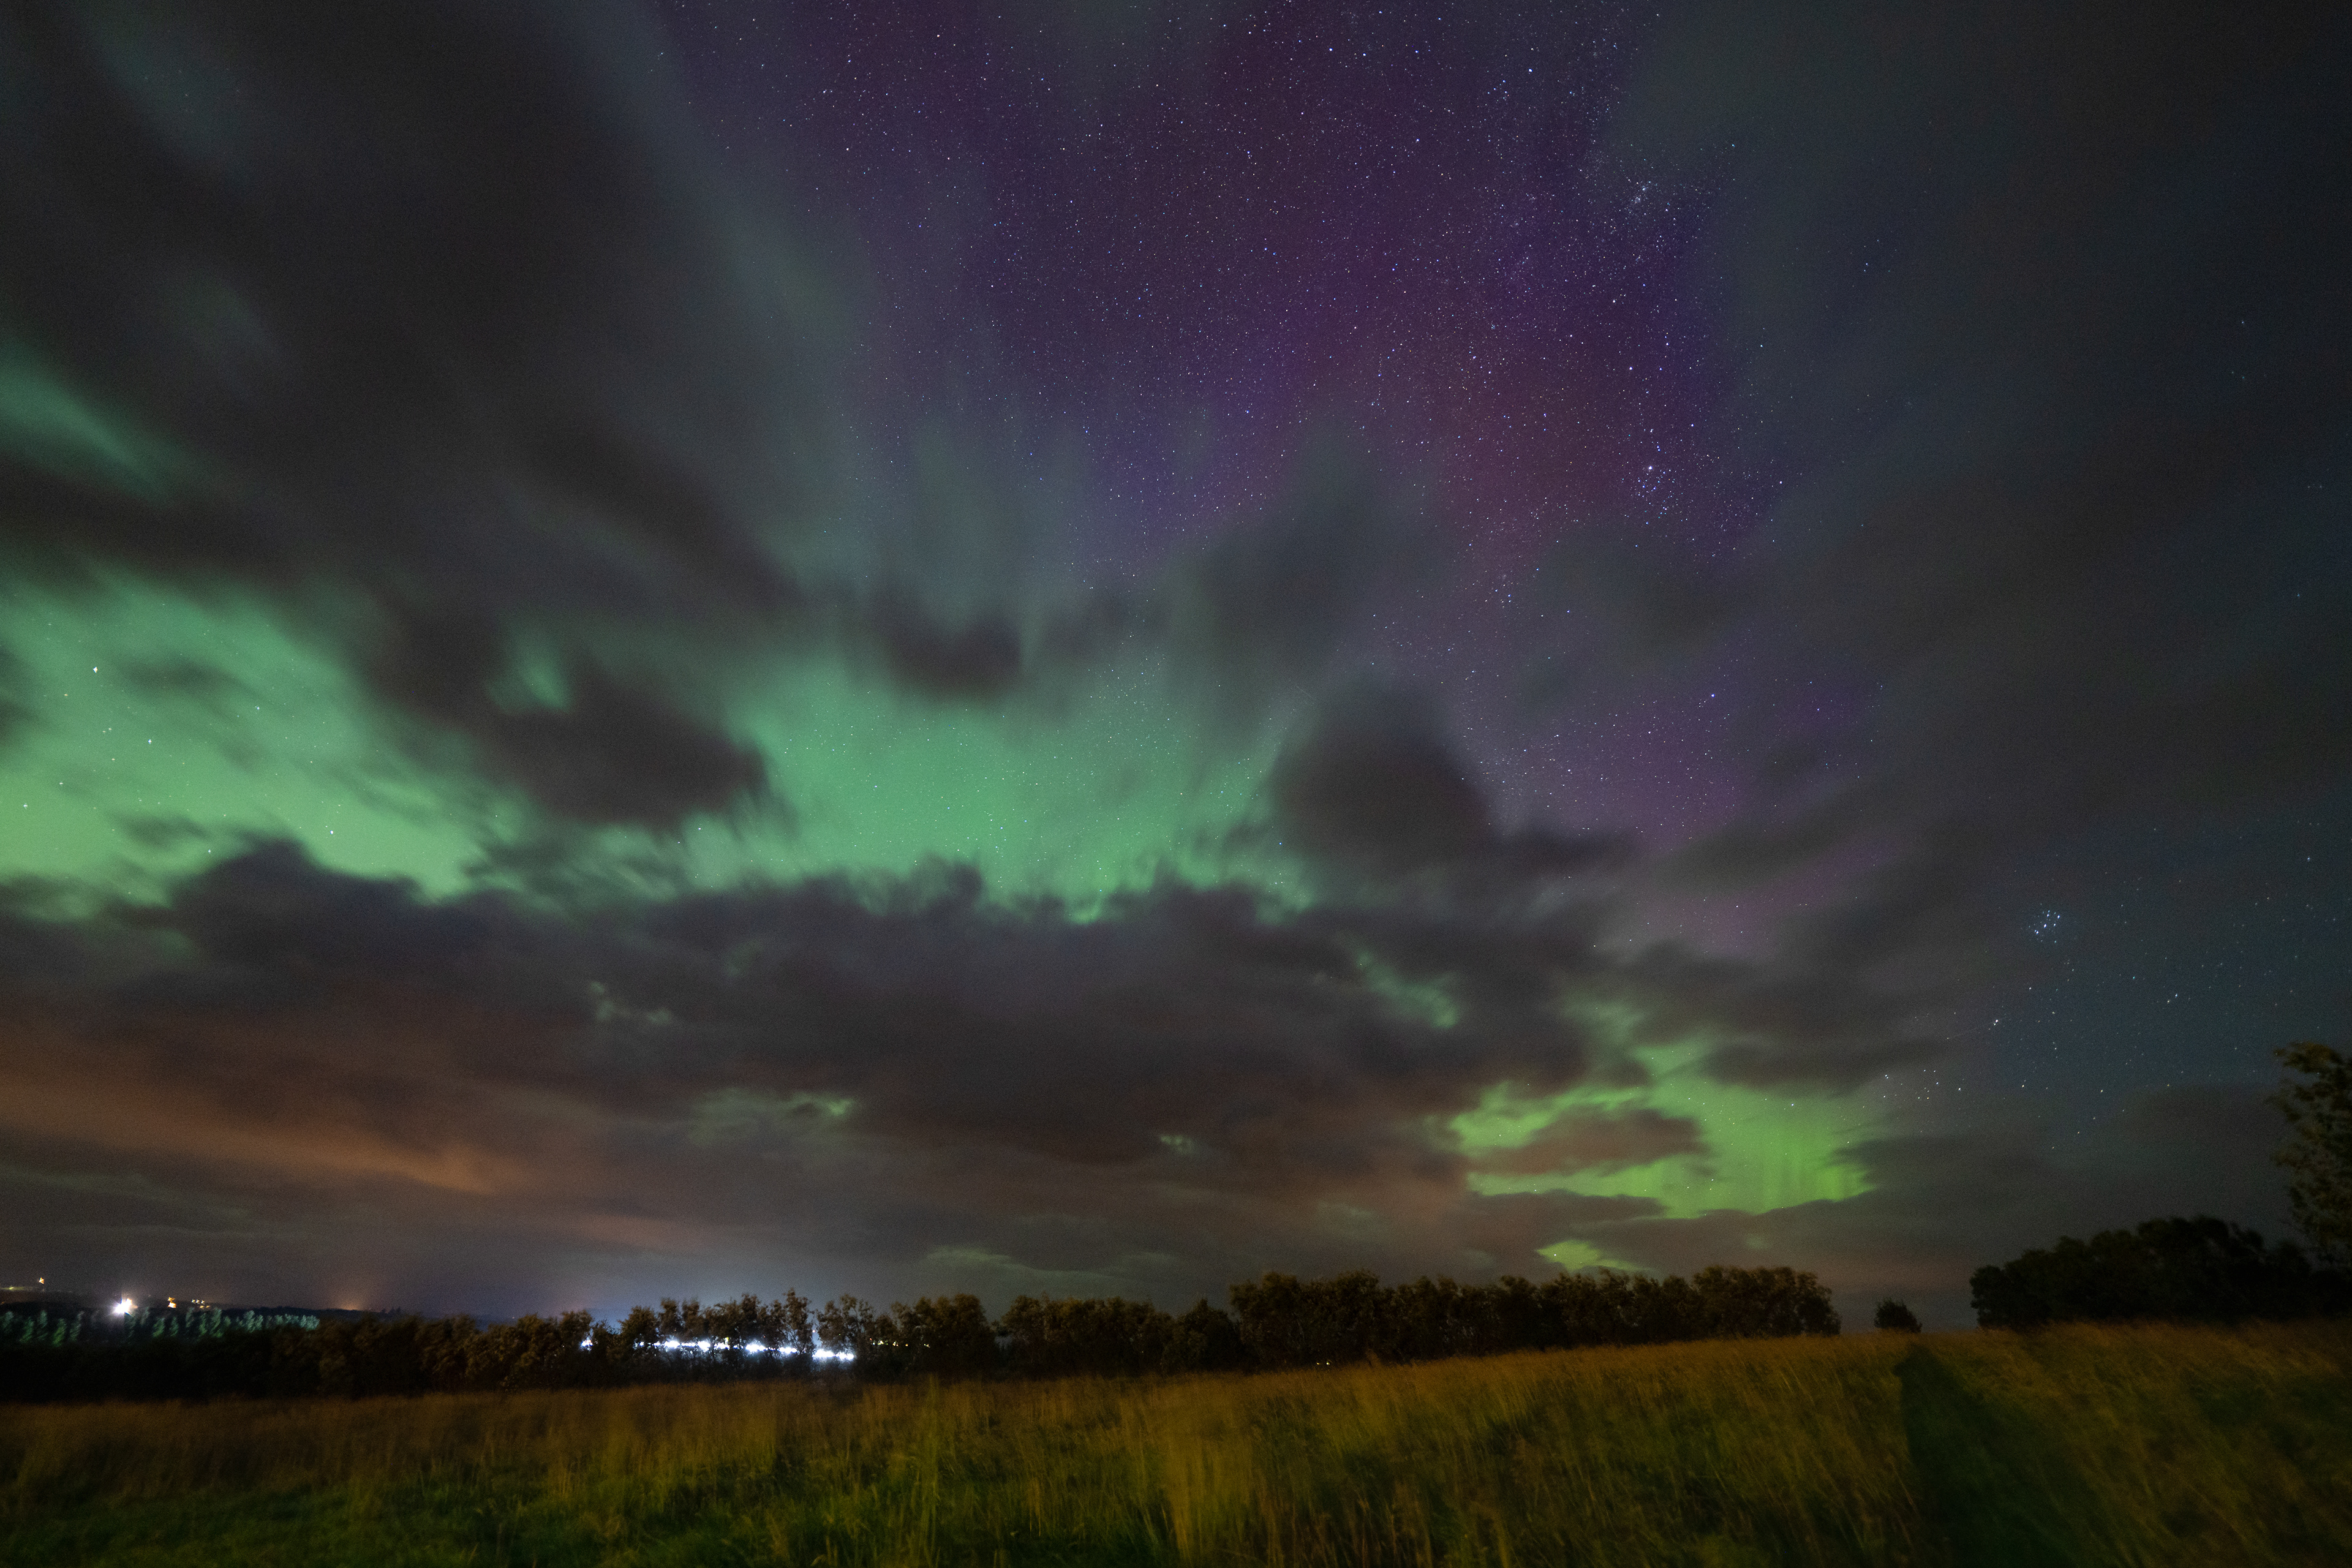
Aurora Borealis, alias Northern Lights - is one of the most beautiful natural phenomena
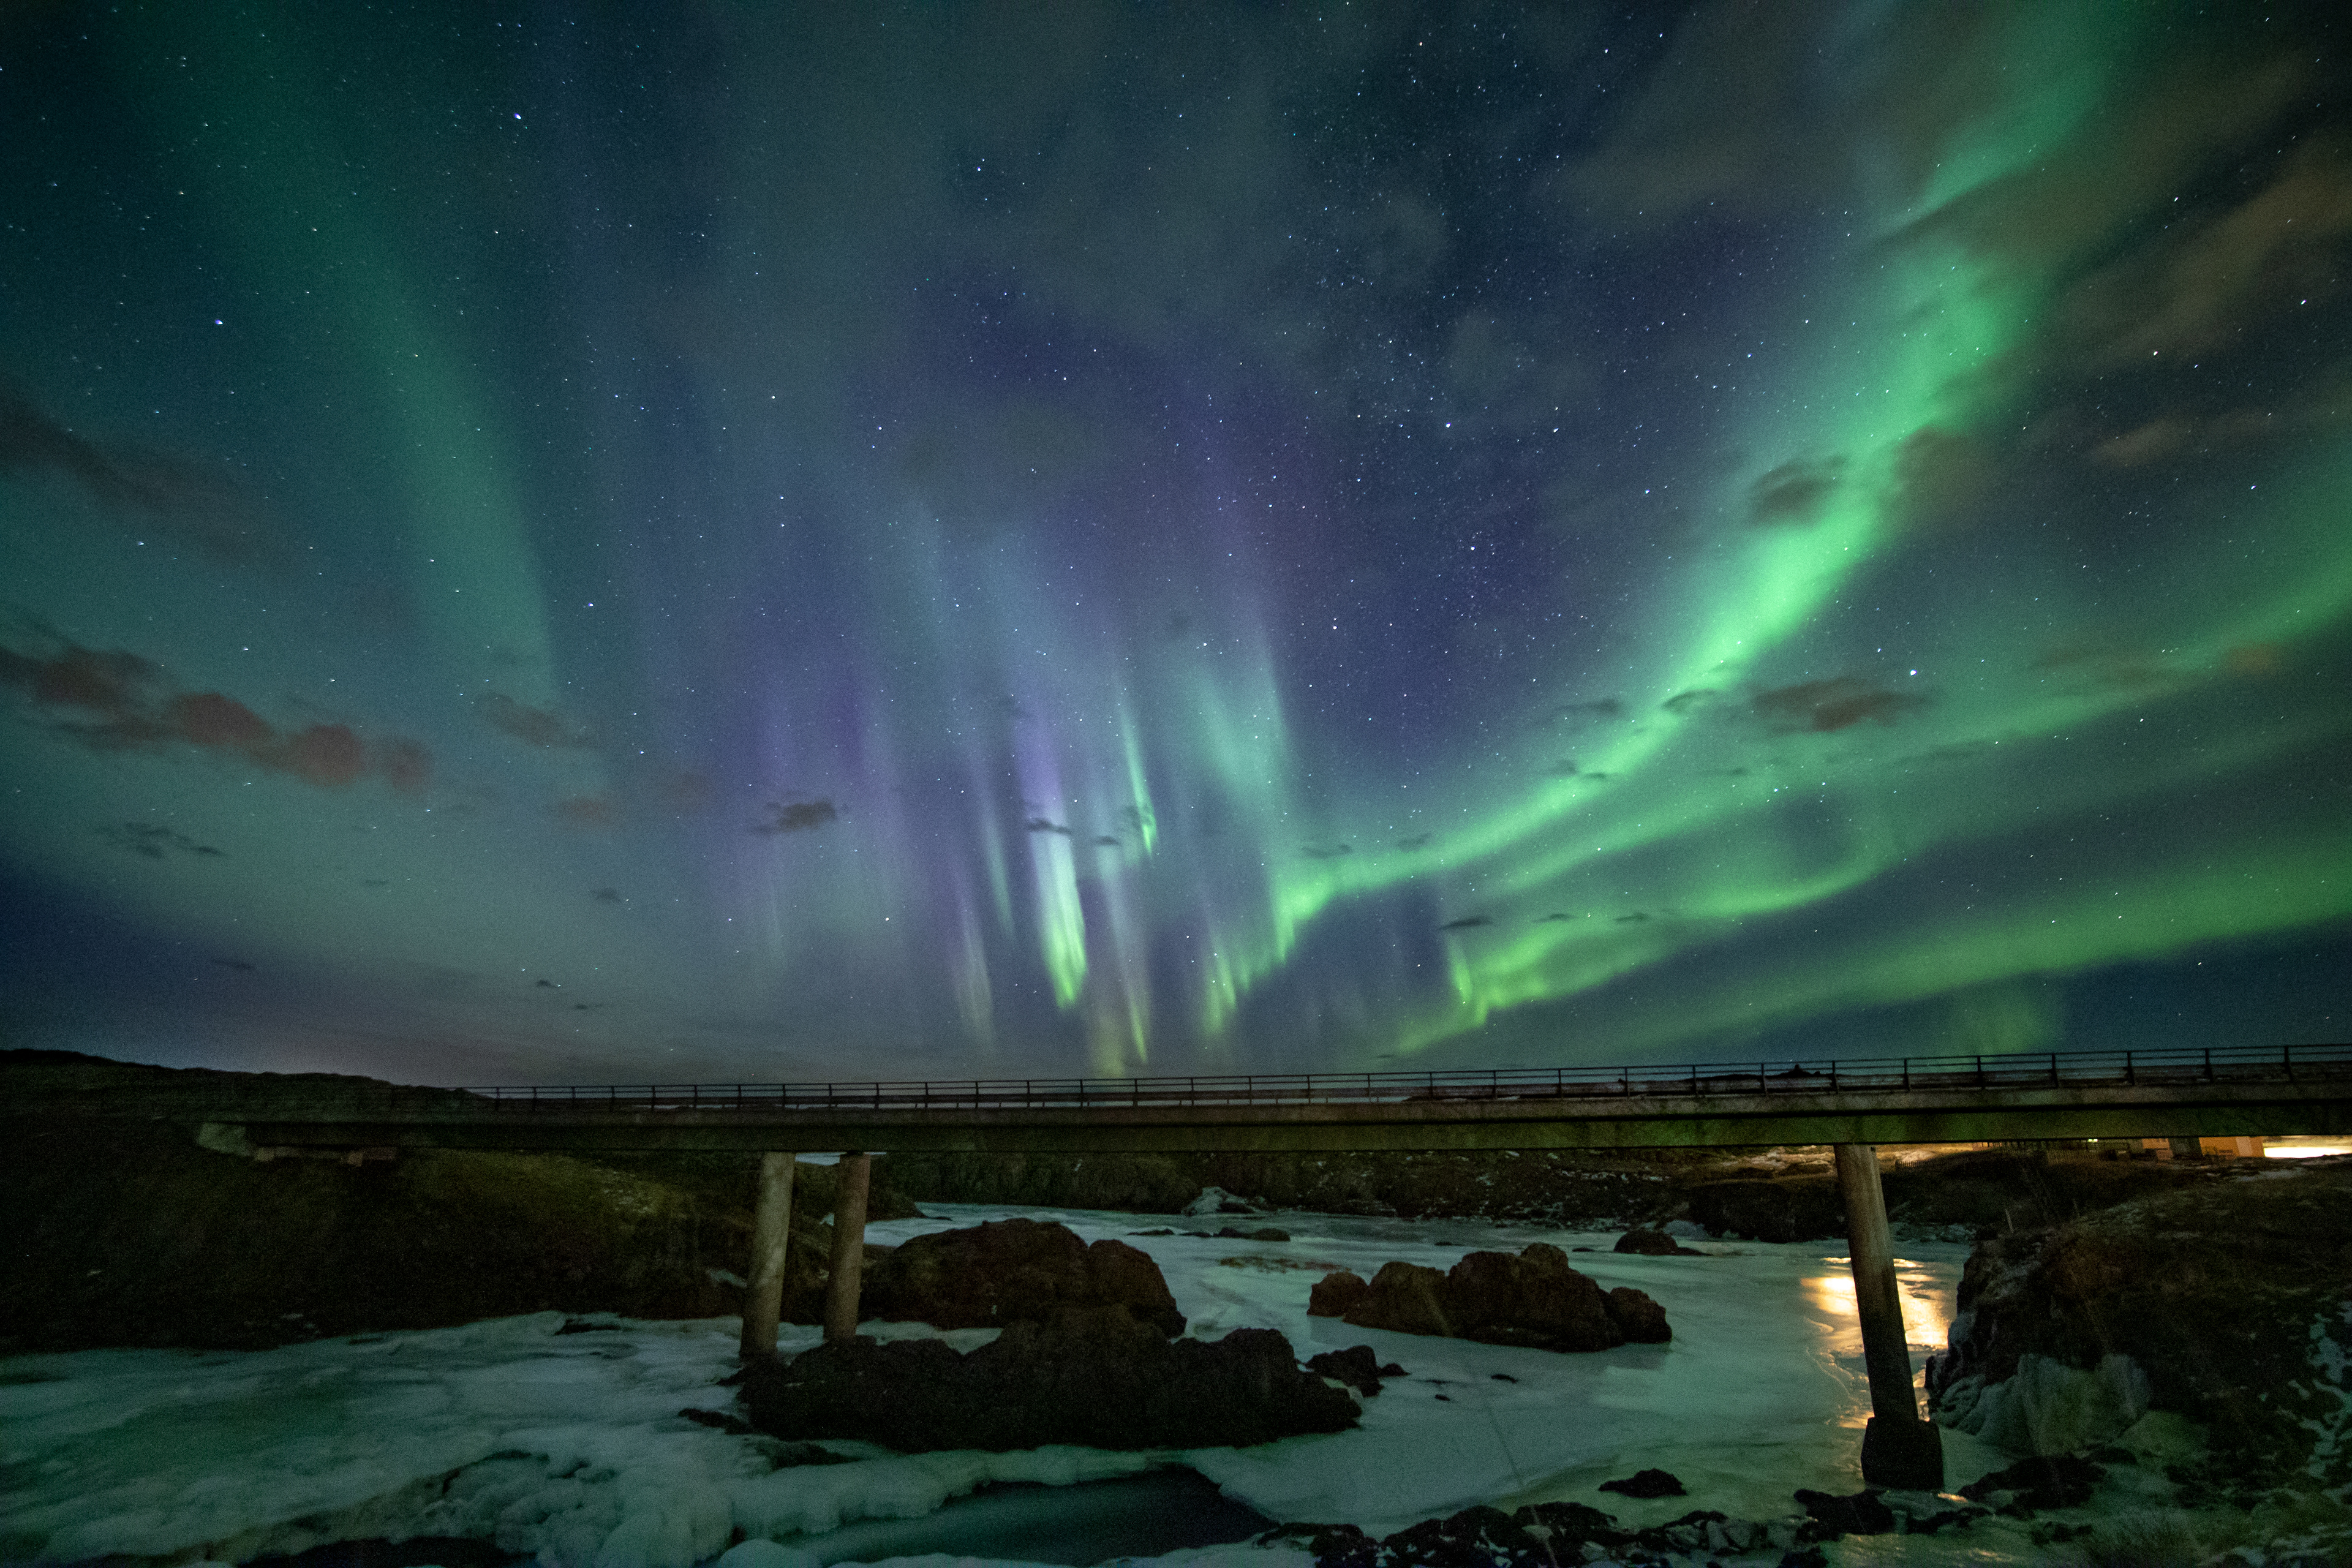
I have been living in a land of fire and ice since 2018, where I have had the opportunity to watch the beauty of the Northern Lights countless times.
And that's why I decided to write a few tips and advice on how to enjoy the observation of the Northern Lights best and capture this beauty.
Aurora - What is it?
An aurora is a colourful light show in the sky caused by the Sun. Auroras happen when particles from the Sun interact with gases in our atmosphere, causing beautiful light displays in the sky. You can see Auroras near the North Pole or the South Pole.
There are two types of Aurora - Aurora Borealis and Aurora Australis.
Aurora Australis or Southern Lights occur in Tanzania and New Zealand in the Southern Hemisphere.
Aurora Australis or Southern Lights occur in Tanzania and New Zealand in the Southern Hemisphere.
Aurora Borealis or Northern lights you can spot in the Northern hemisphere.
It is easier for most people to go north to pursue the Northern Lights.
So let's show a few tips on how to watch Aurora Borealis.
When to go?
There are factors that, unfortunately, you will not affect. Weather and solar activity are unpredictable, but you can influence timing. The aurora season in Iceland starts around 21th -23th of August and ends in mid-April. It is not the case that there is no Aurora in Iceland during the summer months, only it is not possible to see it due to the constant daylight.
If you have already decided to go in the winter months, the best choice is the equinox period, when the sun is closest to the ground - September and March. The sky is usually the brightest during these months, and the activity is the best. There is still plenty of daylight in these months to enjoy Iceland's other activities undoubtedly offers. Also, avoid days when the moon is full. The weaker activity could completely engulf the moonlight.
If you have already decided to go in the winter months, the best choice is the equinox period, when the sun is closest to the ground - September and March. The sky is usually the brightest during these months, and the activity is the best. There is still plenty of daylight in these months to enjoy Iceland's other activities undoubtedly offers. Also, avoid days when the moon is full. The weaker activity could completely engulf the moonlight.

Where to go?
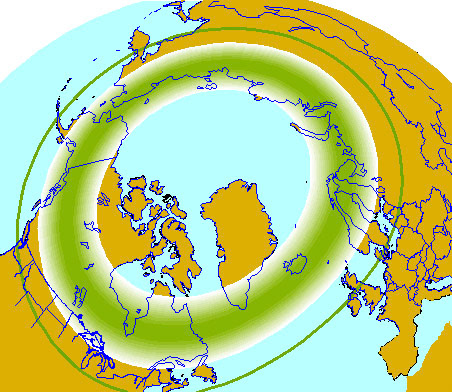
If you think that the further north you go, the better, that's not entirely true. Aurora occurs in the so-called "Aurora zone", which is about 2500 km from the northern field.
These are the most common places where you can see the Northern Lights:
Sweden - Abisko, Björkliden, Jukkasjärvi, Kiruna, Lulea, Tornedalen
Finland - Inari, Ivalo, Kakslauttanen, Luosto, Nellim, Nuorgam, Rovaniemi, Saariselka, Utsjoki
Norway - Alta, Andoya, Bodo, Finnmark, Hammerfest, Harstad, Karasjok, Kirkenes, Kjollefjord, Lakselv, Lofoten Islands, Narvik, Nordkapp, Skibotn, Svalbard, Tana Bru, Tromso, Vardo
Iceland - Akureyri, Grimsey, Hvalfjordur, Isafjordur, Þingvellir National Park, Reykjavik, Snæfellsnes, Egilstaðir
Greenland - Ammassalik, Isortoq, Kangerlussuaq, Kulusuk, Kuummiut, Sermiligaaq, Tasiilaq, Tiniteqilaaq
Russia - Murmansk, Salekhard, Severodvinsk
Alaska - Anchorage, Barrow, Bettles, Denali, Fairbanks, Fort Yukon, Prudhoe Bay
Canada - Calgary, Dawson City, Fort McMurray, Fort Nelson, Gillam, Lake Athapapuskow Manitoba, Pangnirtung, Whitehorse, Yellowknife, Yukon
The further you go from civilization, the better you will do. Not only will you enjoy complete tranquillity in remote nature, but you will also increase your chances of observation without light pollution.
What to take with you?
In addition to patience, you will need a few extra things. As I have already mentioned, the aurora borealis can be seen mainly in the winter months in Iceland, so it is crucial to adapt your wardrobe accordingly.
You also need to keep in mind that you will spend more than just a few minutes outside. Sometimes it takes tens of minutes or hours for the sky to turn green. When that finally happens, the glow can play over your head for hours, and it's tough to go home, even if only for a few minutes, until the show is over.
There are many ways to warm up on a frosty night under the stars. Undoubtedly, a few shots of the Icelandic Brennivín are among the proven ones.
Tips to watch out for:
Clear sky
The most important factor is the weather. If it is cloudy, you will not see Aurora even if the activity is high.
There are many good sites for the weather. In Iceland, it is Vedur. One of the best sites is the Norwegian website or Windy.com
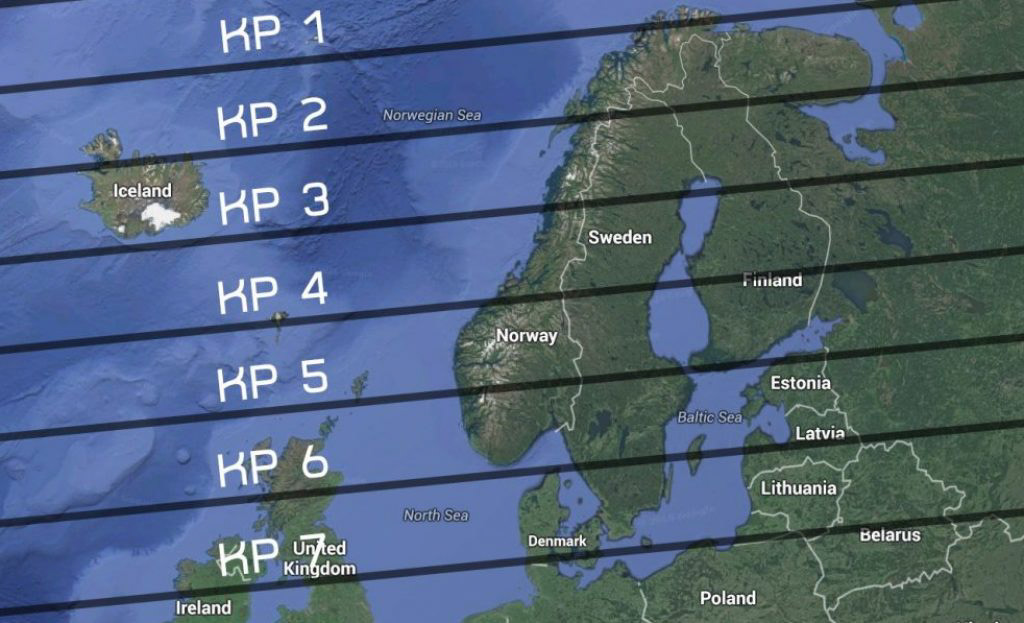
KP index, Bz index
The KP index is often mistaken for an essential factor tracked by Aurora. It can only tell us in what latitude we can observe the aurora borealis.
It is much more important for observers to monitor Bz Index values.
Although an Aurora can happen with a positive Bz, a negative Bz is generally better. A negative Bz helps the solar wind grab the Earth's magnetic field, leading to an Aurora more easily. So a negative Bz is good.
Solar wind speed
If it averages around 350km / s and less, we have very little chance of seeing anything. In the event of a sudden acceleration, nature tells us that something is going on, and therefore more professionally, solar lighting enters the Earth's atmosphere through a coronal hole. The speed of 400-500km / s already means a great chance to see something, and anything over 500km / s in combination with clear skies gives us almost certainty.
We can not predict aurora activity easily. Forecasts change every day. Clear skies, darkness, low light pollution, coronary spots in the sun, Bz index, and many other factors depend on whether lights appear above your heads.
Many applications can take all these phenomena into account and calculate the percentage probability of observation. It's nothing you can rely on 100%, but it can make it easier for you to decide whether to go hunting today. The most used are HelloAurora, Aurora Alerts, Lumyros, and Aurora.
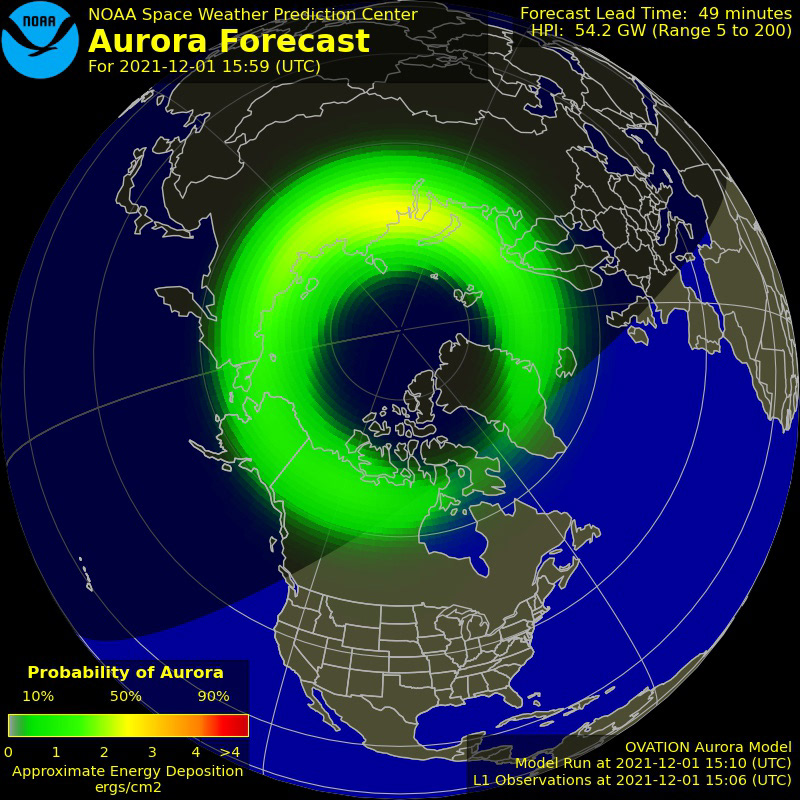
In this picture, you can see a short-term forecast of the location and intensity of the aurora. This product is based on the OVATION model and provides 30 to 90-minute estimates.
In the upper right corner, you can see the HPI value given in GW. To observe the glow with the naked eye, we need the GW value to be at least 12. The higher, the better
How to take photos of Aurora
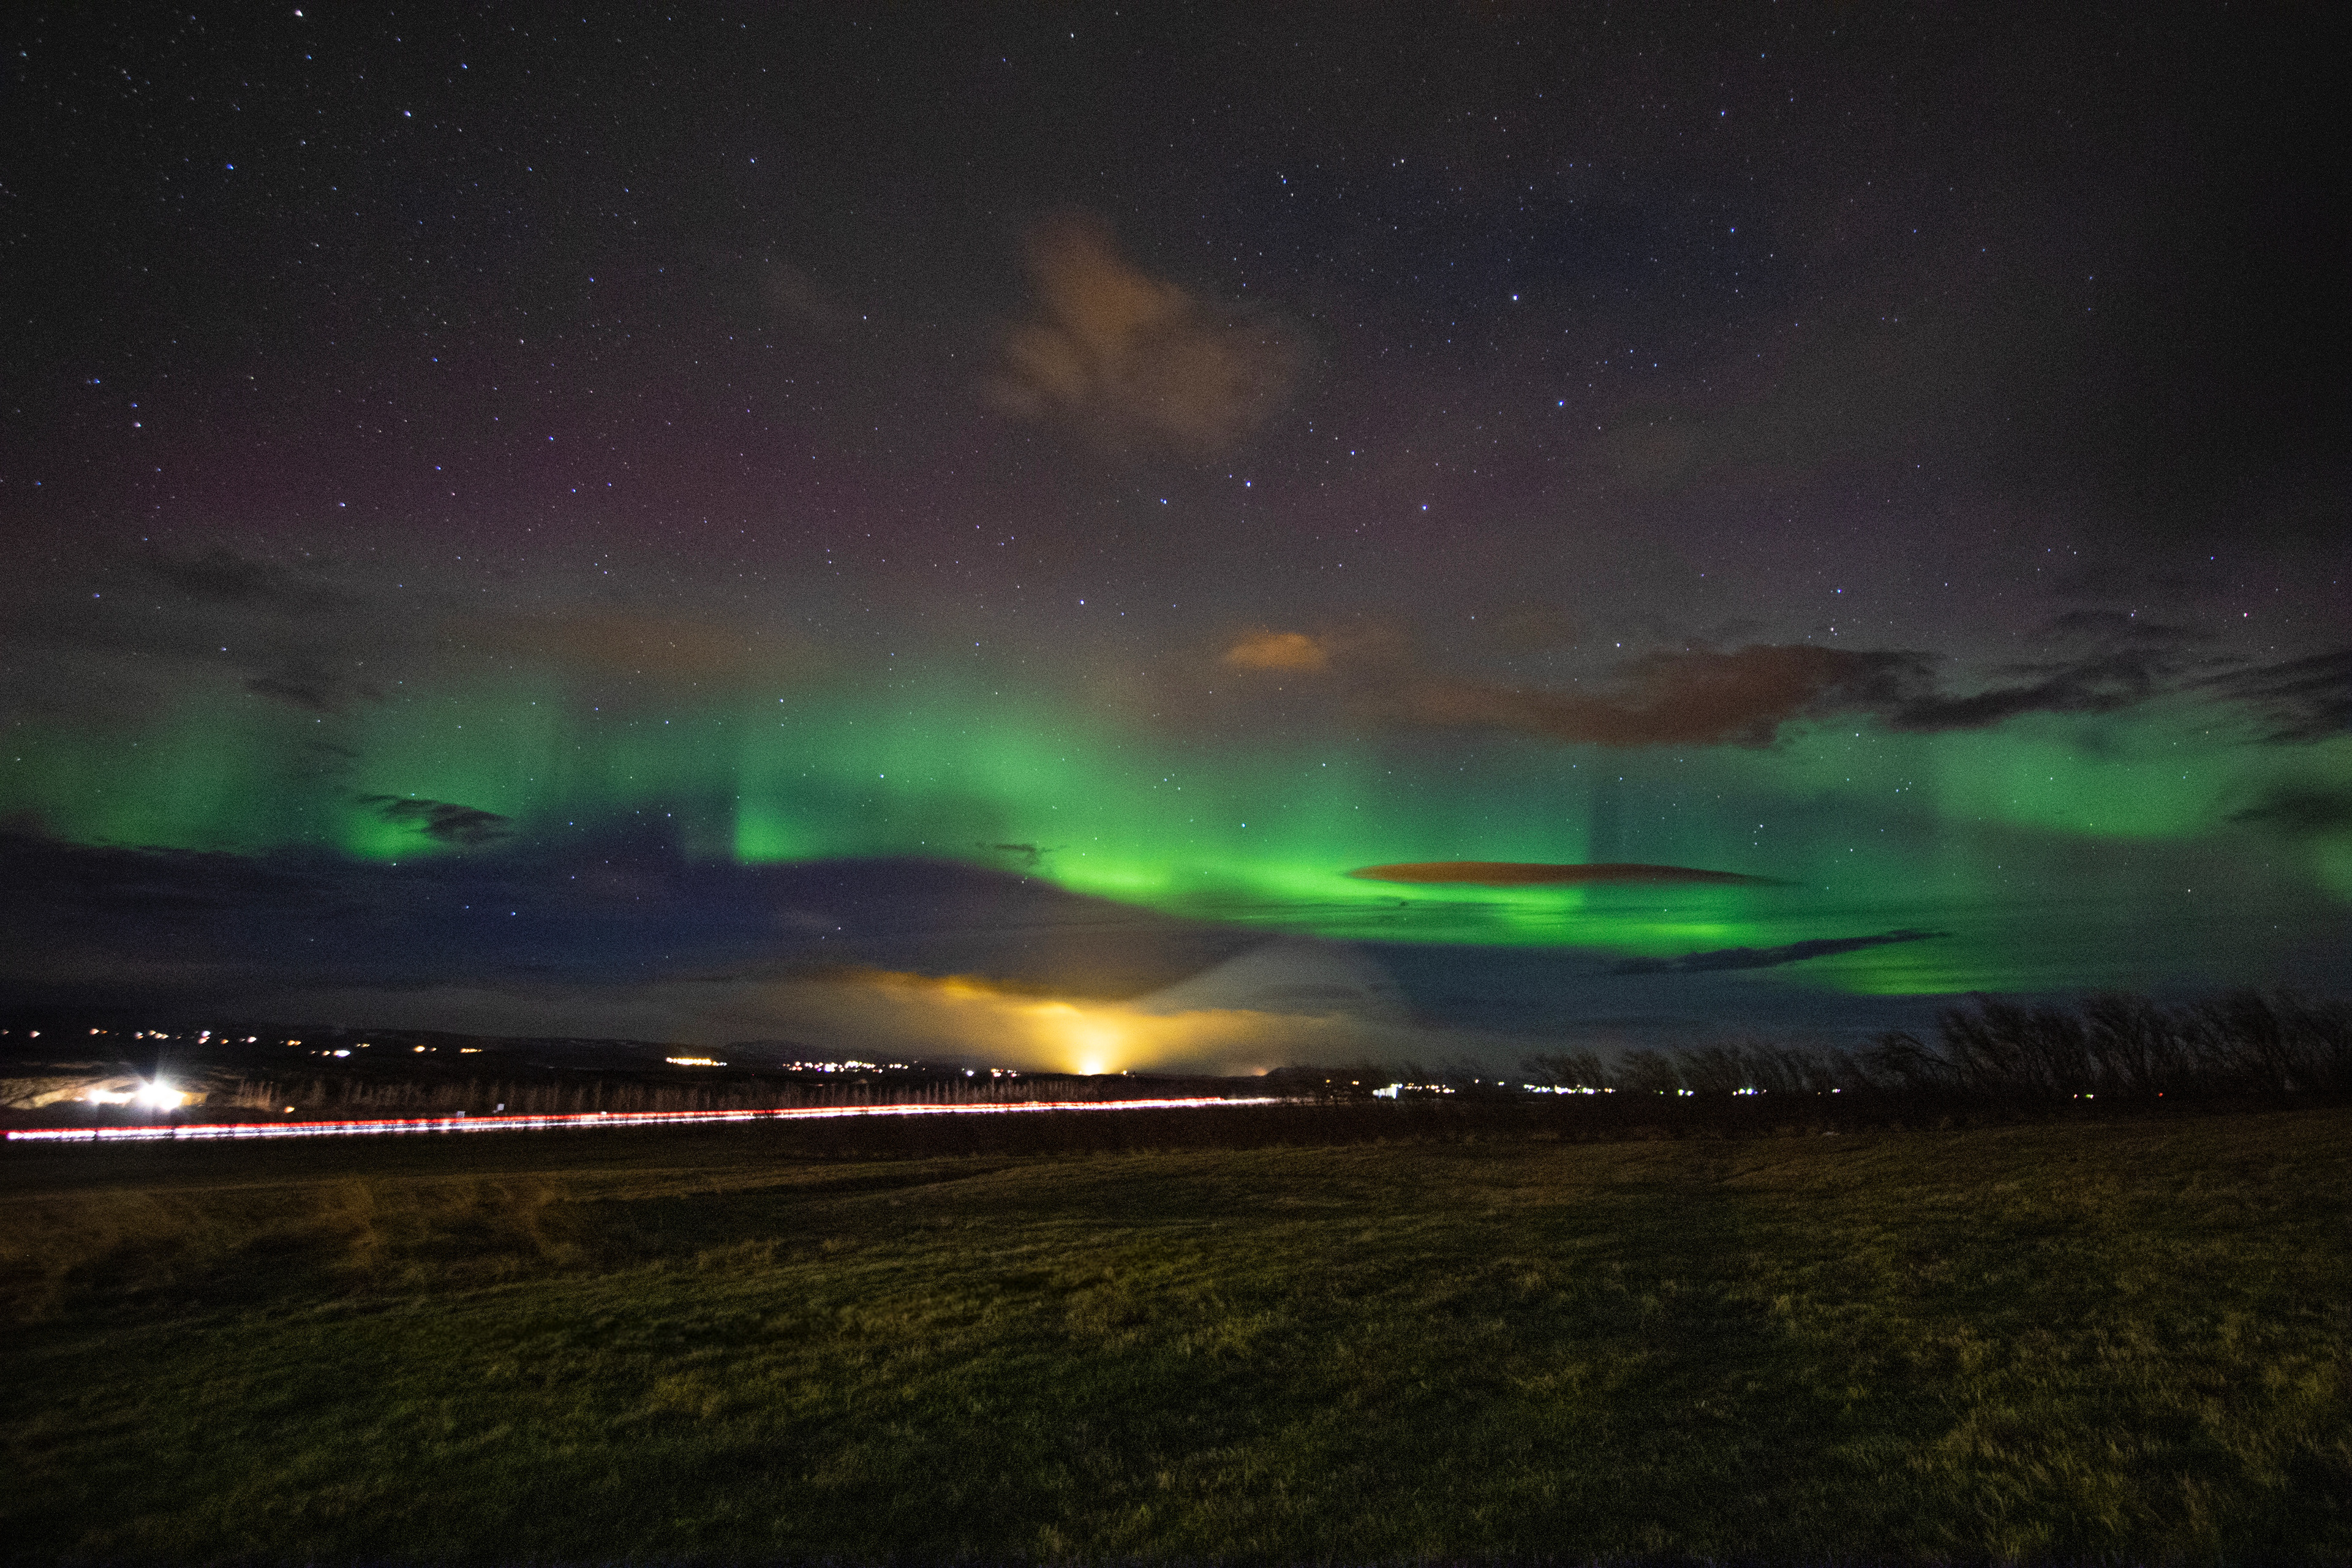
The cameras can capture the lights better than can be seen with the naked eye. Most tourists imagine a green whirlwind of lights in the sky. Unfortunately, the reality is different. During the regular activity, the aurora has only a greenish tinge. At the weaker, it resembles a grey cloud.
If you decide to take pictures of aurora borealis, you need to prepare for it. If you've ever photographed the stars, you know it's not an easy thing. It is more challenging to photograph aurora borealis because you still take photos of the lights with the stars. You are outside in the winter, which is not suitable for photo equipment, especially batteries (it discharges faster).
Unfortunately, it is not possible with a regular phone. If you are the owner of newer iPhones or smartphones, you can capture an intense glow with the help of night shooting mode. If you want to capture the true beauty of the lights, you can't do without a camera. It is unnecessary to buy the most expensive models right away. You need your camera to allow manual exposure time, aperture, and ISO sensitivity. The SLR camera is ideal. I don't recommend compacts due to the size of their sensor.


The camera settings are very individual and depend on the strength of the activity, light pollution, lens, and other factors.
Suppose you think that the longer the time, the better; it's a mistake. It all depends on the speed of the glow. If it moves faster, we choose a shorter time to capture the individual rays - ideally 2-4 seconds. We will have to adapt the ISO to this. ISO is in most cases in the range of 800-3200. Higher would already cause you a lot of noise in the photo.
Suppose you think that the longer the time, the better; it's a mistake. It all depends on the speed of the glow. If it moves faster, we choose a shorter time to capture the individual rays - ideally 2-4 seconds. We will have to adapt the ISO to this. ISO is in most cases in the range of 800-3200. Higher would already cause you a lot of noise in the photo.
We choose a wide-angle lens when shooting aurora borealis and the night sky. The sky is a large area, and you want to capture as many of the shapes of Aurora as possible. Therefore, the wider the lens, the better. I always used a 10-16 mm wide-angle lens to photograph aurora borealis.
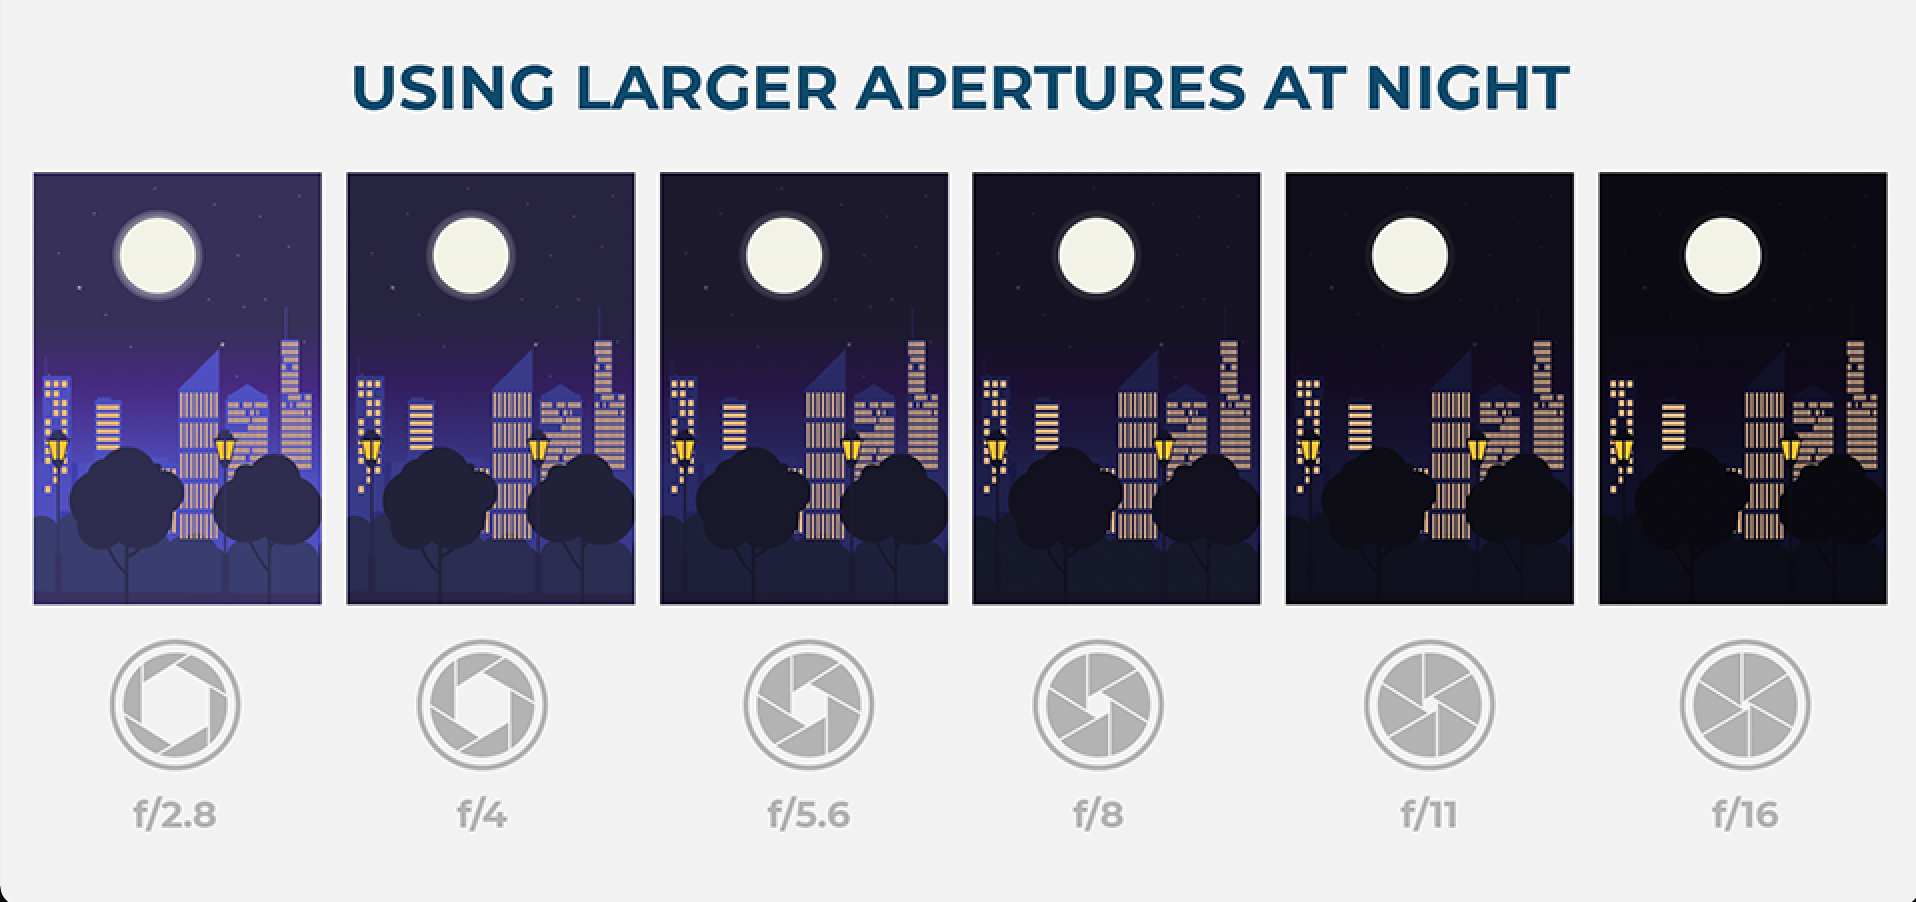
Also, the lens should be as bright as possible. The brightness of the lens expresses how much light the lens can use to draw the subject when shooting. You will take pictures at night so you will need as much light as possible. The brightness gives the aperture number, which expresses the ratio of the focal length to the diameter of the entrance pupil.
Brightness and aperture value give aperture number (f)
The smaller the aperture value, the higher the brightness of the lens. For example, for shooting the night sky, the best choice is a lens in the range of f1.4 - f2.8
Brightness and aperture value give aperture number (f)
The smaller the aperture value, the higher the brightness of the lens. For example, for shooting the night sky, the best choice is a lens in the range of f1.4 - f2.8
I recommend always shooting in RAW format. You will notice the difference in post-production.
Don't forget the tripod. You will take pictures at night for a long exposure, so the camera mustn't move during shooting. The best option is a remote control, which prevents the camera from moving when pressing the shutter button. Another option is to set the timer to 2 seconds.
It is crucial to play around with the settings and always try more variants.
If you have any comments or you would be interested in something that is not listed here, do not hesitate to send me a message on Instagram.